
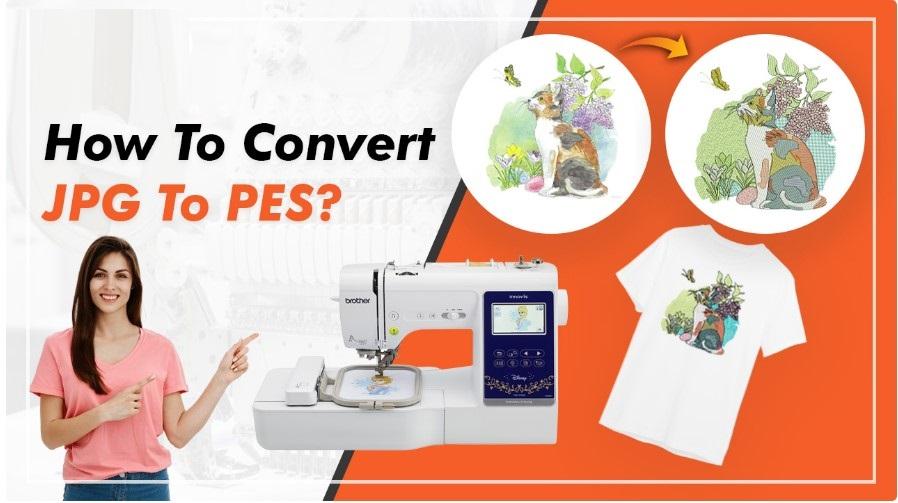
Turning a regular picture into an embroidery design sounds simple. You might have a JPG logo, drawing, photo, or graphic and think, “Can I just put this image into my embroidery machine?”
Not quite.
To turn a JPG picture into a PES embroidery design, the image needs to be converted into embroidery instructions that a compatible machine can understand. That means planning stitches, colors, density, underlay, and sewing order.
The good news is that the process becomes much easier once you understand how it works.
Whether you're preparing a business logo, personalized gift, patch, or clothing design, this guide explains the process in simple terms.
What Is a JPG and What Is a PES File?
Before converting anything, it helps to understand the difference between the two file types.
A JPG is a digital image format. It stores a picture using pixels, making it useful for photographs, logos, screenshots, and online graphics.
A PES file, on the other hand, is an embroidery machine file commonly associated with Brother-compatible embroidery machines. It contains instructions that tell the machine how to stitch a design.
A PES file can contain information such as:
- Stitch placement
- Stitch direction
- Stitch type
- Thread colors
- Stitch sequence
- Needle changes
- Design size
- Machine movements
So, converting JPG to PES isn't simply changing the file extension.
The image has to be digitized.
Can You Directly Convert JPG to PES?
This is one of the most common questions beginners ask.
Technically, a conversion tool may allow you to import a JPG and export a PES file. However, a high-quality embroidery design usually requires more than automatic conversion.
A JPG tells you what the image looks like.
An embroidery file tells the machine how to stitch it.
Think of a JPG as a photograph of a recipe and a PES file as the actual cooking instructions. Changing the file format alone doesn't create the instructions the machine needs.
For professional results, the artwork should be prepared and digitized specifically for embroidery.
How to Turn a JPG Picture Into a PES Embroidery Design
The process can be broken down into several manageable steps.
Step 1: Choose a Clear JPG Image
Start with the best-quality image you have.
A clean, high-resolution JPG makes the digitizing process easier because important details are easier to identify.
Avoid images that are:
- Extremely blurry
- Very small
- Pixelated
- Filled with unnecessary details
- Made up of complicated backgrounds
For example, a simple company logo with bold lettering will usually be easier to digitize than a detailed photograph.
Step 2: Clean Up the Artwork
Before creating stitches, simplify the image where necessary.
Remove backgrounds, unwanted marks, shadows, and tiny details that won't translate well into thread.
You may also need to adjust:
- Brightness
- Contrast
- Colors
- Edges
- Shapes
- Text
Remember that thread behaves differently from pixels.
A tiny detail that looks great on a computer screen may disappear completely when stitched onto fabric.
Step 3: Convert the Artwork Into Embroidery Objects
This is where embroidery digitizing begins.
Instead of treating the image as one flat picture, the artwork is separated into individual shapes and elements.
For example, a simple logo might contain:
- A background shape
- A colored symbol
- Text
- A border
Each element can then receive appropriate embroidery settings.
This gives you much more control over the final result.
Step 4: Select the Right Stitch Types
Different parts of a design require different stitch types.
Satin Stitch
Satin stitches are often used for lettering, borders, and narrow shapes.
They can create a smooth, slightly raised appearance when the width is appropriate.
Fill Stitch
Fill stitches are useful for covering larger areas.
They work well for backgrounds, large shapes, and solid sections of artwork.
Running Stitch
Running stitches are useful for outlines, fine details, and narrow lines.
Choosing the correct stitch type can make a major difference in the final design.
Step 5: Set Stitch Density
Stitch density determines how closely stitches are placed together.
Too few stitches can leave fabric showing through. Too many can make the design stiff, bulky, or difficult to sew.
The ideal density depends on factors such as:
- Fabric type
- Thread
- Stitch type
- Design size
- Garment construction
This is one reason professional embroidery digitizing requires experience rather than simply pressing an automatic conversion button.
Step 6: Add Underlay Stitches
Underlay is often hidden beneath the visible stitches, but it plays an important role.
It helps stabilize the fabric and provides a foundation for the top stitching.
Proper underlay can help improve:
- Stitch coverage
- Shape definition
- Fabric stability
- Overall appearance
The exact underlay settings should be adjusted according to the fabric and design.
Step 7: Set the Stitching Order
The embroidery machine needs to sew different sections in a logical sequence.
Good sequencing can reduce unnecessary movement, thread changes, and jump stitches.
For example, a design may be organized from background elements toward foreground details.
A poorly planned sequence can result in unnecessary trims, overlaps, or registration problems.
Step 8: Choose the Correct Thread Colors
A JPG may contain dozens of colors, but that doesn't mean you need dozens of embroidery threads.
Try to identify the most important colors in the artwork.
For a business logo, you may only need three or four thread colors even if the original image contains many shades.
Simplifying colors can make the design easier and less expensive to embroider.
Step 9: Set the Correct Design Size
Size matters.
A design that looks excellent at 8 inches wide may not work well when reduced to 1.5 inches.
Small designs require careful attention to lettering, stitch density, and detail.
Before saving the final PES file, check:
- Width and height
- Hoop compatibility
- Small details
- Lettering size
- Stitch count
- Fabric suitability
Step 10: Export the Design as PES
Once the design has been properly digitized and checked, export or save it in PES format.
Make sure the PES version is compatible with the embroidery machine you plan to use.
Don't assume that every machine supports every hoop size or feature.
Always check your machine's specifications before production.
Test Stitch the PES Design
Never assume a design is perfect just because it looks good on your computer.
A test stitch is one of the most valuable steps in the entire process.
Use a fabric similar to the final garment and apply the appropriate stabilizer.
Watch for problems such as:
- Thread breaks
- Puckering
- Gaps
- Poor registration
- Excessive density
- Loose stitches
- Incorrect colors
- Uneven lettering
If something looks wrong, return to the digitized design and make adjustments before producing the final order.
Why Automatic JPG-to-PES Conversion Can Fail
Automatic conversion can be useful for simple artwork, but it has limitations.
Software has to interpret the pixels and decide what should become stitches. It may not understand which details are important or how the design should behave on fabric.
Common problems include:
Too Many Stitches
The software may create excessive stitches for small areas.
Poor Detail
Tiny elements may turn into messy or unreadable stitching.
Incorrect Stitch Direction
Stitch angles can affect how shapes look and how light reflects from the thread.
Weak Lettering
Small text can become difficult to read if it isn't digitized specifically for embroidery.
Fabric Puckering
Improper density, underlay, or compensation can cause fabric distortion.
For simple designs, automatic tools may provide a starting point. For logos and production work, manual digitizing often provides better control.
What Images Work Best for PES Digitizing?
Not every JPG is equally suitable for embroidery.
The easiest images usually have:
- Clear outlines
- Simple shapes
- Limited colors
- High contrast
- Minimal background detail
- Readable lettering
A flat logo is generally much easier to digitize than a detailed photograph.
If you want to embroider a photograph, it may require specialized techniques and careful interpretation rather than a standard logo digitizing approach.
JPG to PES Conversion for Logos
Business logos are one of the most common reasons people need to convert an image into an embroidery format.
Suppose you have a company logo saved as a JPG.
The workflow might look like this:
JPG logo → artwork cleanup → embroidery digitizing → stitch settings → test sew → PES file
The goal isn't simply to reproduce every pixel.
The goal is to create an embroidered version that preserves the logo's identity while working properly with thread and fabric.
Should You Digitize the Design Yourself?
That depends on your experience and how often you need embroidery files.
If you're learning embroidery as a hobby, learning digitizing can be rewarding. It gives you control over stitch types, density, colors, and design placement.
However, professional digitizing can save time when you need production-ready files.
This can be especially useful for:
- Business logos
- Detailed artwork
- Small lettering
- Bulk orders
- Multiple garment types
- Tight production deadlines
Absolute Digitizing can help businesses and embroidery users turn artwork into professionally prepared embroidery files when manual digitizing isn't practical.
Tips for Better JPG-to-PES Results
Keep these tips in mind before starting your next project:
Use the Best Artwork Available
A clean original image gives you a much better starting point than a tiny screenshot.
Simplify Where Necessary
Don't force every tiny detail into stitches.
Match Settings to the Fabric
A design for denim may need different settings from one intended for lightweight cotton.
Check Small Text Carefully
Small lettering is one of the easiest elements to lose during embroidery.
Always Test Sew
A few minutes spent testing can prevent an entire batch of ruined garments.
Keep the Original Artwork
Save your cleaned artwork and editable digitizing file. You may need them later for resizing or creating another embroidery format.
Final Thoughts
Learning how to turn a JPG picture into a PES embroidery design is much easier when you understand that it's more than a basic file conversion.
A JPG is visual artwork, while a PES file contains the stitching instructions an embroidery machine needs.
For the best results, start with clean artwork, simplify unnecessary details, select suitable stitch types, adjust density and underlay, organize the sewing sequence, and test the finished design before production.
If the project is important or you need consistent professional results, working with an experienced embroidery digitizing service can also save time and reduce trial and error.
The right preparation can turn an ordinary digital picture into a clean, attractive embroidered design.
FAQs
1. Can I turn any JPG picture into a PES file?
Most JPG images can be used as the starting artwork, but not every picture will produce a good embroidery design. Simple, clear images with strong shapes and limited colors are usually easier to digitize.
2. Is JPG to PES conversion free?
Some software and online tools offer free conversion features. However, professional digitizing may require paid software or a professional service, especially for detailed designs.
3. What software can convert JPG to PES?
Embroidery digitizing software can import image files and allow you to create embroidery objects before exporting the finished design as PES. The exact workflow depends on the software.
4. Why does my converted PES design look different from the JPG?
Thread cannot reproduce pixels exactly. Stitch direction, density, fabric, thread thickness, and design size all affect the final appearance. Proper digitizing helps adapt the artwork for embroidery.
5. Do I need to test a PES file before embroidering a garment?
Yes. A test stitch is strongly recommended, especially for logos or production orders. It can reveal density, registration, sizing, tension, and fabric-related problems before the final garment is embroidered.

 Arabic
 French
 Spanish
 Portuguese
 Deutsch
 Turkish
 Dutch
Dutch
 Italiano
 Russian
 Romaian
 Portuguese (Brazil)
 Greek
Greek